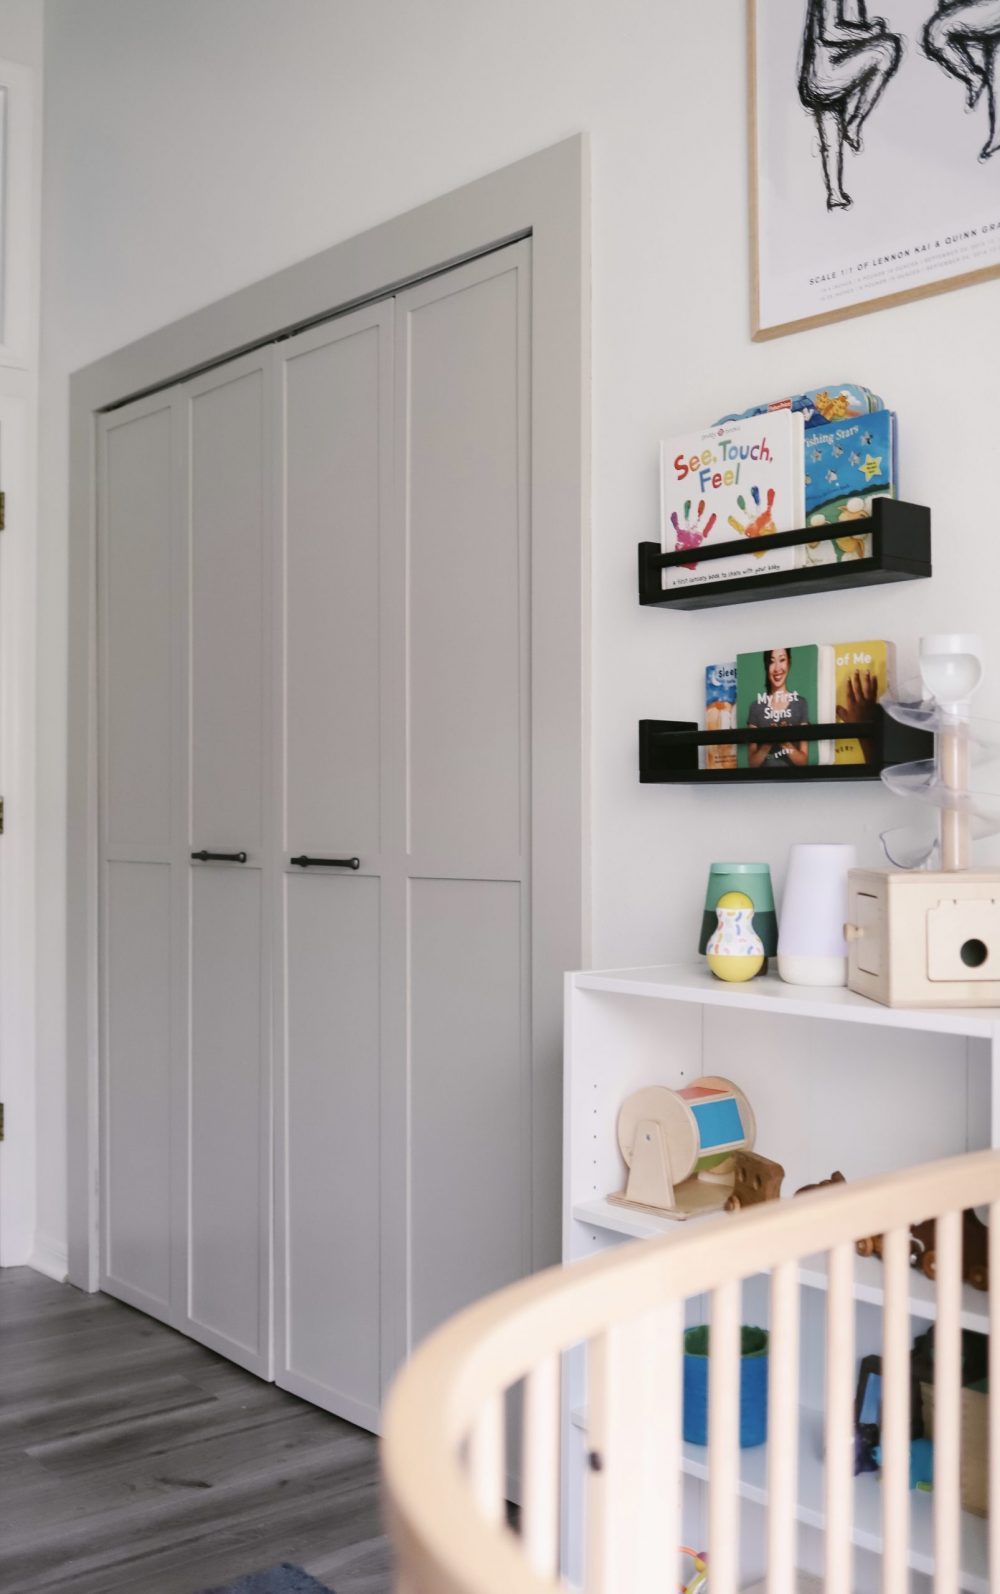
Have bifold closet doors that are falling apart and in need of an update? Don’t throw them out! Instead, use this DIY closet door upgrade step-by-step tutorial to give them a face-lift on a budget!

We had builder-grade bifold closet doors in the rooms throughout our home, and on top of looking like a budget option, they were also beginning to fall apart. I looked around at pricing to replace them and I was SHOOK at the prices of new bifold closet doors – in styles that I wasn’t even really excited about.
I mean, between $75-$150 was the base price for one set of most replacement bifold doors, and we were able to take on this entire DIY closet door upgrade project (2 sets of doors!) for under $100!

Unfortunately, I don’t have a full before photo of the closet. Maybe we were just too excited to get started and I missed my opportunity.
In fact, we started this project LAST YEAR and got one-half of the closet covered with this process… and then the holidays happened. We had other projects, priorities, and travel plans come up.
While this project is super simple and easy to do, we tried this process first in the twin’s room. The fact that we put our boys down for bed at 6pm every night means there were plenty of evenings we realized that we could tackle the second half of the closet, but we didn’t want to wake sleeping babies to make it happen.
The plus side of the long wait was that we were able to test the DIY closet door upgrade to make sure it could handle the wear and tear of it being highly-used. And the good news? It handled it flawlessly… even before adding actual handles!
DIY Closet Door Upgrade

I wanted to go with a shaker-style DIY closet door upgrade. This helps the closets flow in a similar style to what we did in the laundry room with our DIY for Covering Breaker Boxes: A Faux Cabinet Tutorial!
How to Update your Bifold Closet Doors
Cover up the ugly.
It really is that simple! We used 1/4″ smooth plywood, cut to size for each door panel at our local store to make it really easy, and glued them ONTO the existing closet panels.
To make sure it all stayed secure, we also used a brad nailer to finish nail the plywood to the door.
In order to create the shaker cabinet style, we used PVC lattice moulding to create the frames. They’re lightweight, so it doesn’t add much weight or bulkiness to the door panel! Once cut, we used the same process as the plywood – first we glued and then finish nailed.


Don’t forget the finishing touches.
To really give this closet upgrade a grand finish, it’s all about the details.
First, we filled any nail holes and seams with spackling. Next, we sanded when dry and painted it smooth with a foam roller. A paint sprayer would be amazing for this finishing touch as well, but alas, I don’t have one yet.
We used an accent color to set these newly updated closet doors apart. By painting both the upgraded larger trim and the new doors the same color, the whole closet really pops!
The color we used on our DIY closet door upgrade is Revere Pewter by Benjamin Moore.


Another finishing touch you don’t want to forget are the door handles!
Do you want to know the part I was most worried about? Drilling into the freshly painted doors to add handles. 😬😓
So I used painter’s tape to make it simple and painless! Have you used this trick before?


DIY Closet Door Upgrade Tutorial for BiFold Closet Doors
Materials
- 2 - 4x8x1/4” 5.2mm Sande Plywood
- 10 - 1/4” x 1 1/2” x 8” Primed White PVC Lattice Moulding
- 1 Box 18-Gauge x 3/4 in. Glue Collated Brad Finish Nail (1000 per Box)
Tools
- Finish nailer: Ryobi ONE+ 18V Cordless AirStrike 16-Gauge 2-1/2 in. Straight Finish Nailer (Tool Only) with Sample Nails
- Hack saw: 10 in. Adjustable Hack Saw
- Wood glue
- Spackling paste
- Block sander
- Foam mini paint roller
Instructions
- Measure to cut 1/4” plywood to size for each door at local store (4 pieces/1 per door). *store will cut to correct dimensions.
- Spread glue and then nail in place for each partition.
- Cut PVC to fit each long side of the partition. Nail in place.
- Measure to cut PVC to fit inside lengthwise at top and bottom of partition, between the two vertical edges.
- Measure to the center of partition and measure to cut one more piece of PVC to run lengthwise.
- Glue the back and then place and finish nail in place.
- Repeat for all remaining partitions.
- Fill in nail holes with caulk or spackle.
- Sand and paint.
- Optional: change trim around the closet opening to match new door finish.
Recommended Products
As an Amazon Associate and member of other affiliate programs, I earn from qualifying purchases.
-
 RYOBI ONE+ 18V Cordless AirStrike 16-Gauge 2-1/2 in. Straight Finish Nailer (Tool Only) with Samp...
 -
 10 in. Adjustable Hack Saw
 -
 5.2mm - Sande Plywood (1/4 in. Category Common: 1/4 in. x 4 ft. x 8 ft.; Actual: 0.205 in. x 48 in. x 96 in.)
 -
1/4 in. x 1-1/2 in. x 8 ft. Primed White PVC Lattice Moulding
-
 Gorilla Wood Glue
 -
 18-Gauge x 3/4 in. Glue Collated Brad Nail (1000 per Box)
 -
 Spackling Paste
 -
 Sanding Sponge, Auerllcy Coarse/Medium/Fine/Superfine 4 Different Specifications Sanding Blocks Assortment,Washable and Reusable. (4 PCS)
 -
 4 in. x 3/8 in. High-Density Foam Mini Paint Roller with Frame
Our Top Home DIY Ideas and Tutorials!
An Ikea Bunk Bed Hack: DIY Underbed Storage Drawers With Wheels
Would you try this DIY closet door upgrade in your house? Do you have any questions? Let me know in a comment below!


Brett Ehlert says
It looks pretty awesome, at first I thought you replaced them with a new wood frame, but it worked out pretty well. The end result looked so much better than before.
Jackie Wallace says
These doors turned out so amazing! I love the look of them. I am totally wanting to recreate these in our home here in Isle of Palms, SC. We are doing some kitchen cabinet refinishing next week, but this might have to be our next project. Thanks for all the tips!
Ignacia says
Hi! I wanted to know what the inside of the closet doors looks like? Did you get rid of the slats?
Tabitha Laboy says
We kept the slats! Just covered them up. They actually help to keep the doors sturdy. It’s hard to get a photo of them because they’re so hidden. When the closet doors open, they fold on themselves and you can’t really see the back of the doors.